Discover what is media library in WordPress and how to use and manage it like a champ!
Have you ever found yourself swimming in a sea of images, videos, and files, trying to keep your digital ducks in a row?
Well, you’re NOT alone.
Enter the lifesaver that is the media library in WordPress. It’s your one-stop shop for all things media on your site.
What exactly is the media library in WordPress?
A magical place right within your WordPress dashboard where every image, video, document, and file you’ve ever uploaded lives in harmony – that’s the media library!
It’s basically your personal cloud storage that’s baked into WordPress, making it super accessible and easy to use.
Why should you care about the media library?
Every blog post you beautify with images, every page you sprinkle with videos – they all come from the media library.
It’s ESSENTIAL for keeping your website attractive, engaging, and organized.
In this article, I’ll take you by the virtual hand and guide you through every nook and cranny of the WordPress Media Library.
From uploading your first file to getting those images to look just right on your page, I’ve got a step-by-step tutorial coming your way.
By the end, you’ll be a Media Library whiz, ready to tackle your website’s content with gusto.
This post covers:
- Understanding the WordPress media library
- Navigating the WordPress media library
- Organizing your media library
- Advanced uses of the media library
- How to manage media in WordPress (step-by-step tutorial)
- Best practices for using the media library
- Common issues media library & troubleshooting
- Conclusion: Master WordPress media library!
- FAQs about media library in WordPress
Understanding The WordPress Media Library
So, what can this tool really do for you? Let’s break it down.
Types Of Files Media Library Supports
The WordPress media library is quite the accommodating host for a variety of file types.
Images:
- JPEG (.jpeg, .jpg): Great for photos and images with gradients.
- PNG (.png): Perfect for images with transparent backgrounds.
- GIF (.gif): For those fun animated images that bring life to your posts.
- WebP (.webp): A modern image format that provides superior lossless and lossy compression for images on the web.
Documents:
- PDF (.pdf): Ideal for guides, white papers, or eBooks.
- Word documents (.doc, .docx): When you need to upload that report or an info doc.
- PowerPoint presentations (.ppt, .pptx, .pps, .ppsx): For when you want to share presentations.
- Excel documents (.xls, .xlsx): Handy for sharing tables and data.
- Text files (.txt): When only plain text will do.
Audio:
- MP3 (.mp3): The standard for audio files, great for music or podcasts.
- WAV (.wav): Often used for high-quality sound recordings.
- OGG (.ogg): An open format sometimes used for audio.
Video:
- MP4 (.mp4): The go-to for video files, supported by most browsers.
- MPEG (.mpeg): An older format, but still hanging around.
- MOV (.mov): Often created by Apple devices.
- WMV (.wmv): Windows Media Video, less common but still supported.
- AVI (.avi): Another older format, not always recommended for web use.
- OGV (.ogv): The video counterpart to OGG, an open format.
Others:
- ZIP (.zip): Compressed files, useful for downloadables like media packs or product files.
The Media Library’s Organization
Now, you might wonder, “How does this library stay so organized?”
It’s like having a librarian who NEVER sleeps and always keeps the shelves neat.
The Media Library automatically sorts your files by the date they were uploaded, but you can also filter them by file type or search by name.
Tools & Tricks Of The Media Library
This isn’t just any old library – it’s like a library with superpowers.
You can preview your files right in the dashboard, edit images on the fly (cropping, rotating – you name it!), and even get down to the nitty-gritty with file details like sizes and captions.
Plus, you can drag and drop files straight into the library, making uploads a breeze.
Accessing Your Media Library
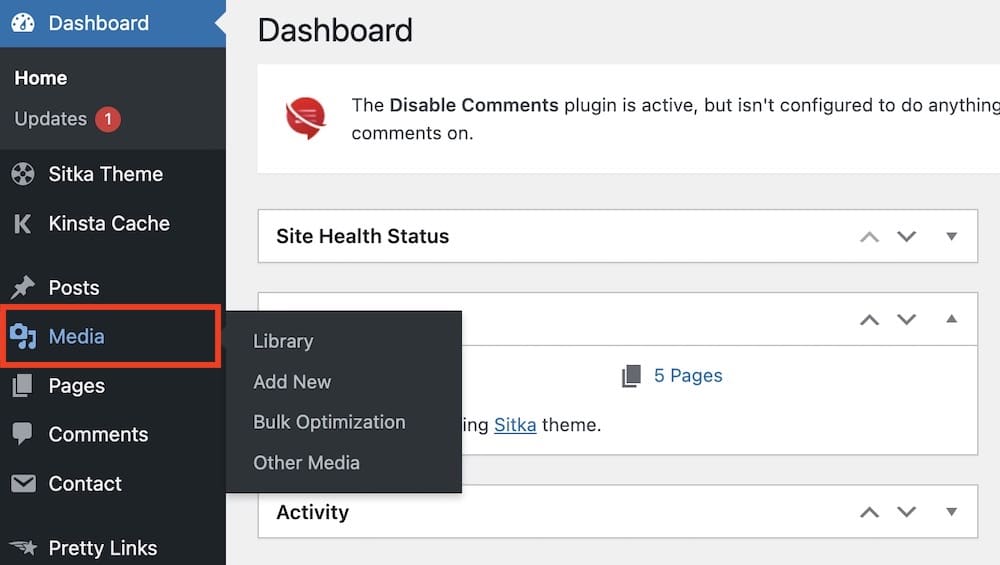
So, how do you get into this exclusive media club? EASY.
Once you’re logged into your WordPress dashboard, simply click on “Media” in the left sidebar, and voilà – you’re in!
From here, you can upload new files, manage your existing goodies, and enrich your site with all sorts of visual spice.
Navigating The WordPress Media Library
Ready to explore the media library? Let’s take a magical tour together.
Interface Overview
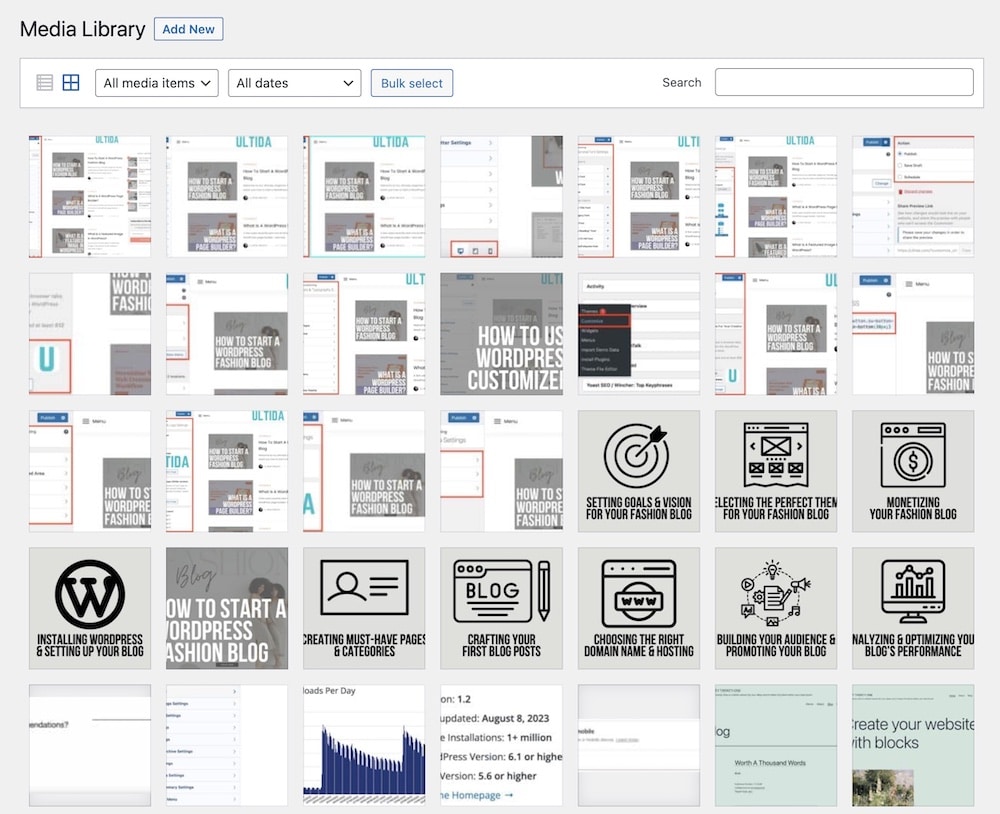
The media library’s interface is pretty straightforward. You’ve got a grid view, which is like a mosaic of thumbnails, perfect for the visually inclined.
And then there’s a list view, which arranges your files in a neat line, complete with all the details you might need at a glance.
Plus, there are handy buttons to add new files or select bulk actions – more on that below.
Uploading Files To The Media Library
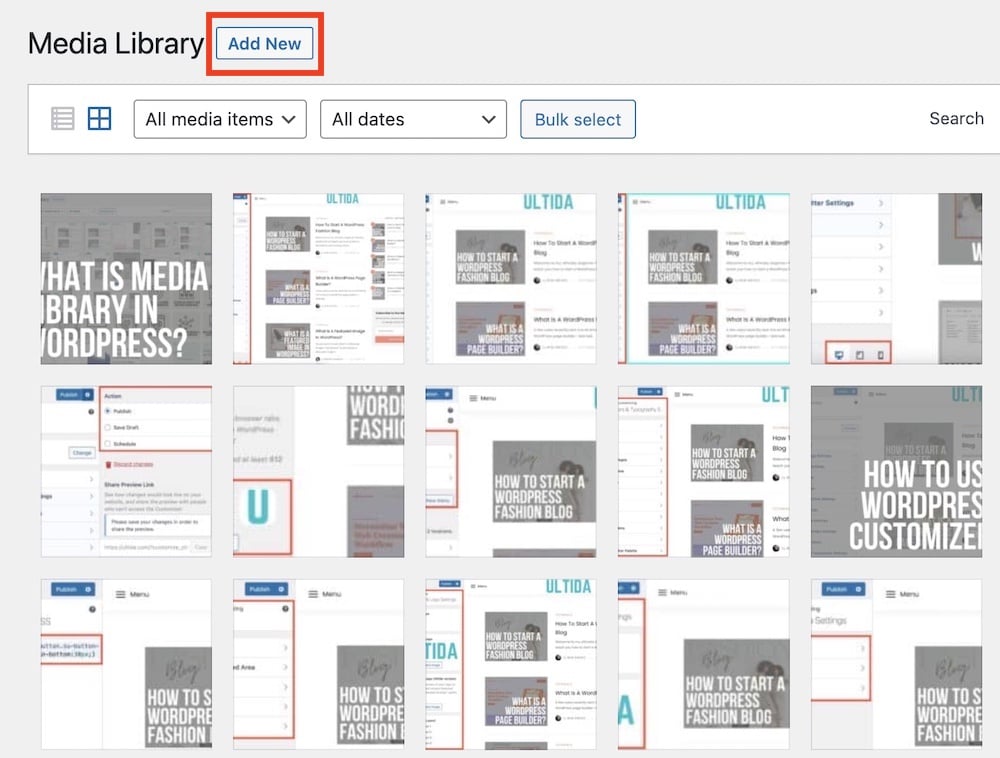
Uploading files is as simple as dragging and dropping them into the media library window or using the “Add New” button to select files from your computer.
You can add one at a time, or a bunch, and watch as your WordPress site becomes richer with each upload.
Searching & Sorting Media Files
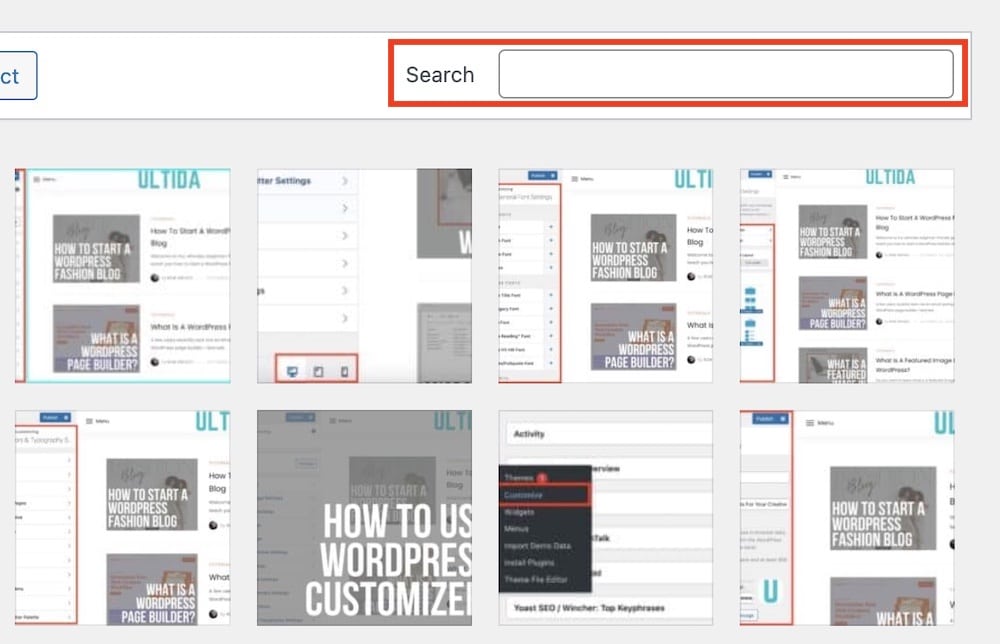
Got tons of files? No problem!
You can find that one perfect shot by using the search bar – just type in a keyword, and it’ll pop up.
And if you’re all about order, you can sort files by type, date, and more with just a few clicks.
Media Attachment Details & Options
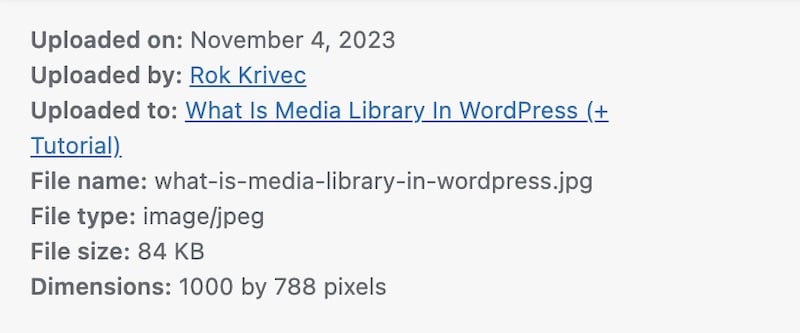
Every file in your library has a story. Click on any file, and you’ll see an attachment details window.
Here, you can see or change the file’s title, caption, alt text, and description.
You can even decide how it links from your site.
Editing Images Within The Media Library
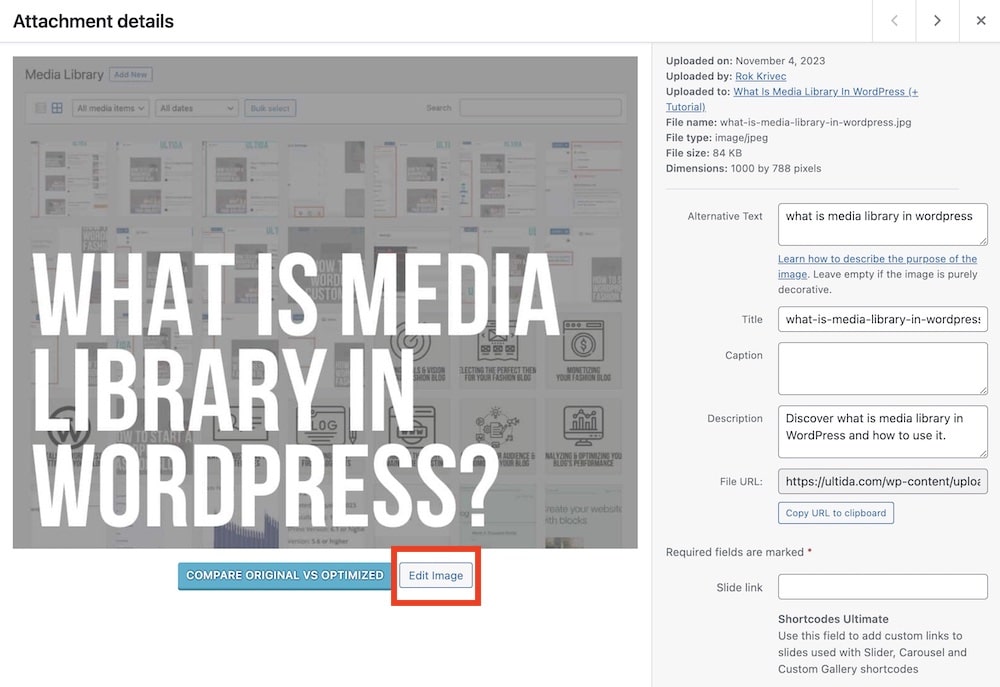
Spotted a wild photobomber? The media library has a built-in image editor for quick fixes like cropping, rotating, or flipping your images.
Just click “Edit Image” in the attachment details, and you can tweak away.
Organizing Your Media Library
It’s time to end playing hide and seek with your files.
Ttidying media library ensures you can find everything just when you need it.
Here are some neat ways to keep things spick and span.
Creating Folders & Albums (If Using Plugins)
Out of the box, WordPress is more of a “put all your toys in one basket” kind of deal.
But hey, there’s a world of WordPress plugins ready to add some Marie Kondo magic to your media library.
Plugins like FileBird, WP Media Folder, or Enhanced Media Library let you create folders and albums to organize your files just the way you like.
Utilizing Descriptive Titles & Alt Text For SEO
While WordPress doesn’t have eyes to appreciate your stunning images, search engines sure do – well, in their own crawly way.
When you upload a file, give it a DESCRIPTIVE title and fill in the alt text field with a brief, keyword-rich description.
Pro tip: Some say this isn’t necessary, but we receive quite some traffic from image results just to make our media more SEO-friendly.
It’s not just about being organized; it’s about being found.
Think of it as naming your pets in a way that tells you their quirks at a glance. “Fluffy Sleeps On Keyboard” tells you more than just “cat1”.
Bulk Actions For Managing Media
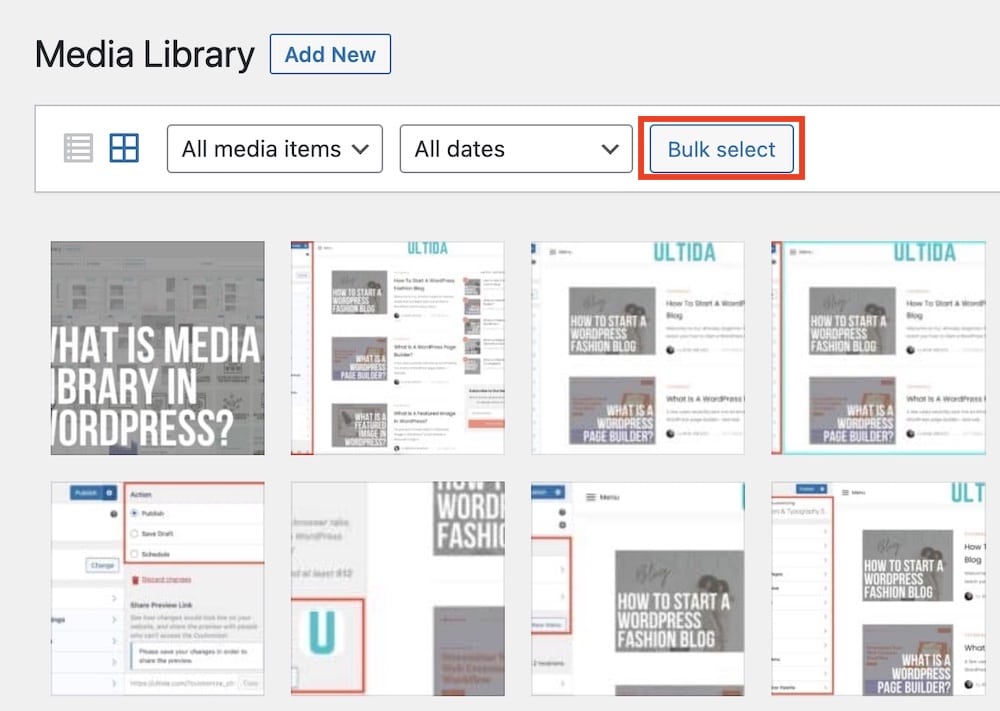
Got a bunch of files to delete or need to make room for new stuff?
You can select multiple files and delete them, move them to a folder (if you have a plugin installed), or even add the same descriptive text to a group of images.
Tips For Maintaining An Organized Library
Alright, quick tips time!
First, make it a habit to clean up your library every once in a while – just like you would with your room. A tidy space equals a tidy mind, right?
Second, use consistent naming conventions for your files; it’s a game-changer for finding things later on.
And lastly, don’t be afraid to use those 3rd-party tools to help you manage your media better.
Advanced Uses Of The Media Library
Are you ready to level up your Media Library game?
It’s not just a pretty space to store your images and files; it’s a powerful tool that can elevate your site from neat to WOWZA.
Using Media In Posts & Pages
Every picture tells a story, and with your media library, adding that story to your posts and pages is a breeze.
When crafting content, you can pluck the perfect image or video from your library and insert it directly where you want it.
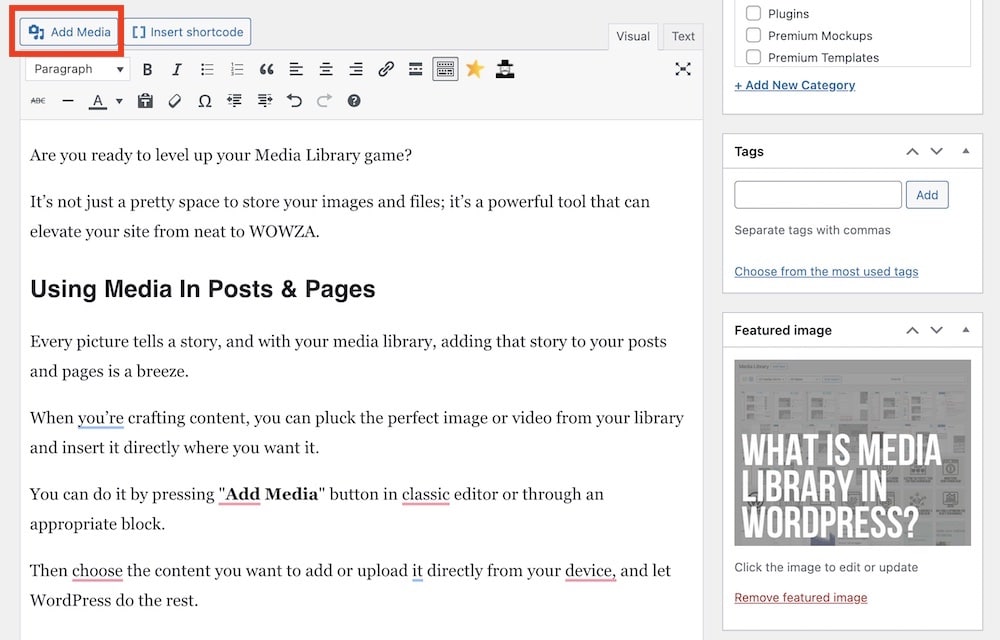
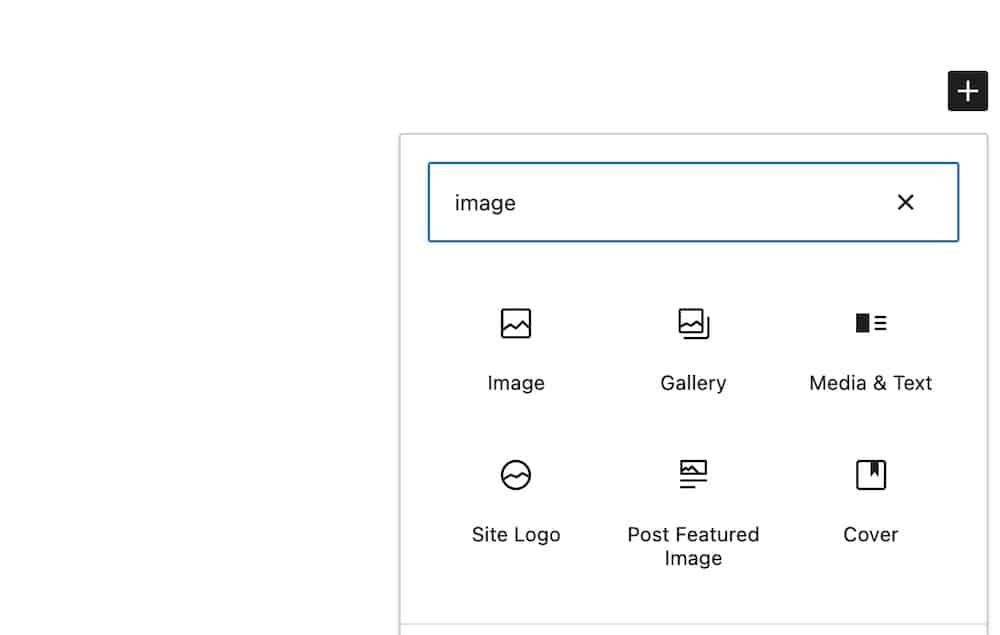
You can do it by pressing the “Add Media” button in the classic editor or through an appropriate block in WordPress Gutenberg.
Then, choose the content you want to add or upload it directly from your device, and let WordPress do the rest.
Media Library’s Role In Theme Customization
You can use the media library to customize your header, background, and any other image-based feature your WordPress theme supports.
Not just that, but you can also use it to create a video background! (But for this, it’s best to pick a video background WordPress theme.)
Just choose your image from the media library when customizing your theme, and you’ll have a site that looks tailor-made.
Plugins To Extend The Media Library’s Functionality
If you’re feeling like a magician wanting more tricks up your sleeve, plugins are your magic wands.
Want to optimize images for faster loading? There’s a plugin for that.
Check out our tutorial on how to optimize images for WordPress. Or go straight to picking the best WordPress image optimization plugin.
How about creating stunning image galleries? Yep, there’s a plugin for that too. (Have you seen our collection of the best free WordPress gallery plugins?)
The sky’s the limit here; from media categorization to integration with cloud services, plugins can make your media more powerful than a wizard’s spellbook.
Step-by-Step Tutorial: Managing Media In WordPress
Are you ready to master the mystical arts of managing media in WordPress?
I will guide you through this enchanting journey step by step.
Accessing The Media Library
First off, let’s remember how to access the media library.
Log in to your WordPress dashboard, and you’ll see a menu on the left. Look for the “Media” option. Click it, and that’s it.
Adding New Files
1. Single File Upload
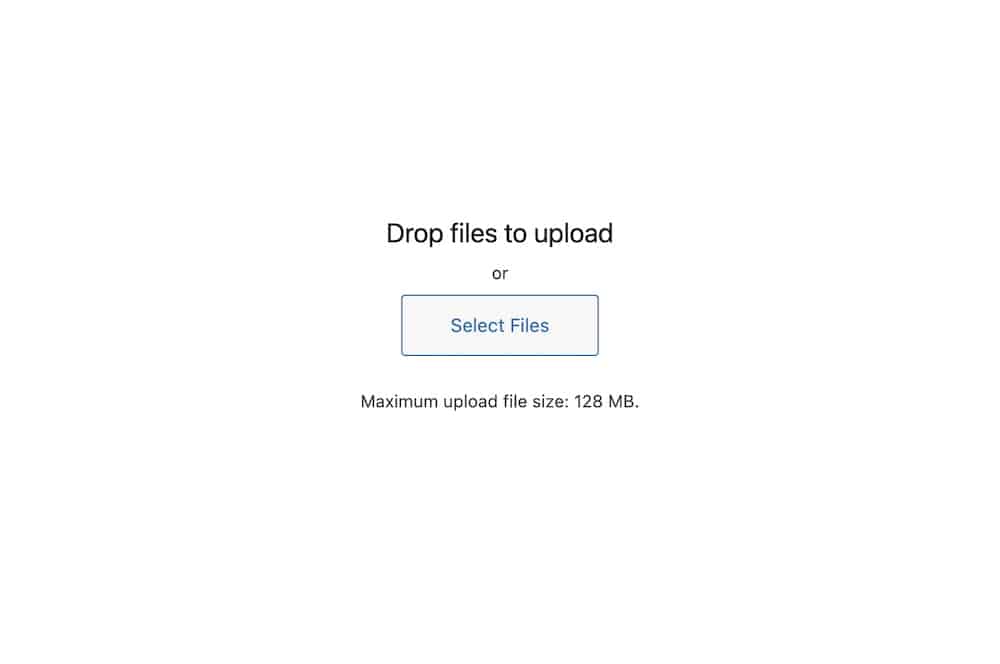
Want to add a single file? Easy peasy!
Click the “Add New” button at the top of the media library.
Then, drag and drop your chosen file into the window or click “Select Files” to pick one from your computer.
2. Multiple File Upload
Got a bunch of files? No sweat!
You can drag and drop as many as you like into the window, or select multiple files from your folder (hold down that Shift or Command/Ctrl key) when browsing your computer’s files.
3. Media File URL Upload
Got the URL of an image you want to share?
While WordPress doesn’t support URL uploads directly in the Media Library, you can insert it into posts or pages.
Go to the post editor, click “Add Media,” and then “Insert from URL.” Paste your URL, and presto, your image is part of the story.
Editing Files In The Media Library
1. Basic Image Editing (Cropping, Resizing, Rotating)
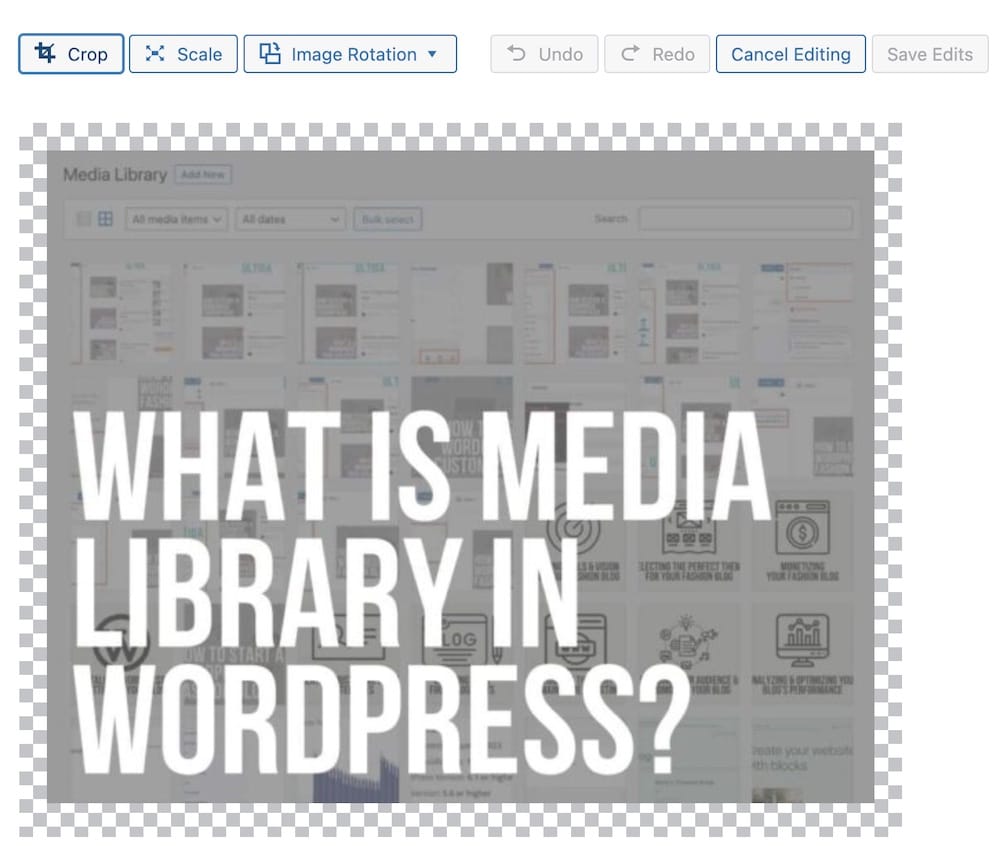
Need to tweak an image? Click on the one you want to edit, and hit “Edit Image” below the preview.
You can crop, rotate, flip, or resize to your heart’s content.
It’s like giving your photo a mini-makeover – snip snip, turn turn, and it’s looking fabulous.
2. Editing Metadata (Titles, Captions, Alt Text, Description)
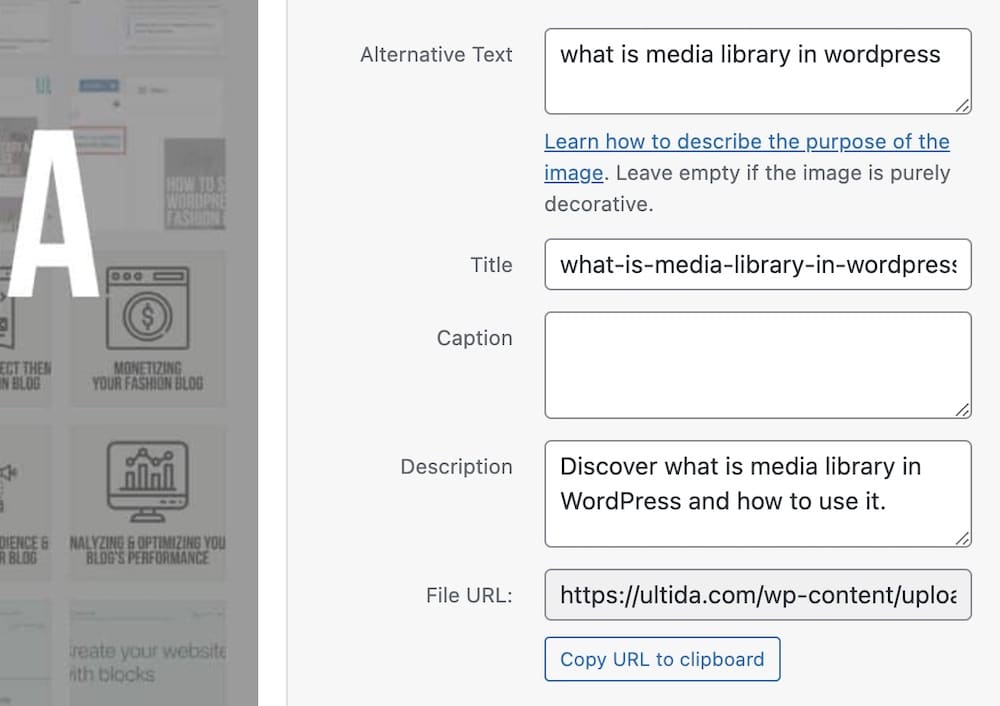
To change the details of your file, click on it and look to the right.
You’ll see fields for the title, caption, alt text, and description.
Fill these in to make your content both informative and SEO-friendly.
Organizing Files (Using Default Methods Or Plugins)
By default, WordPress doesn’t use folders, but you can organize files by date or title.
Want more?
Plugins are your allies.
Install a media organization plugin, and create folders to sort your files like a librarian with a new label maker.
Deleting & Restoring Media Items
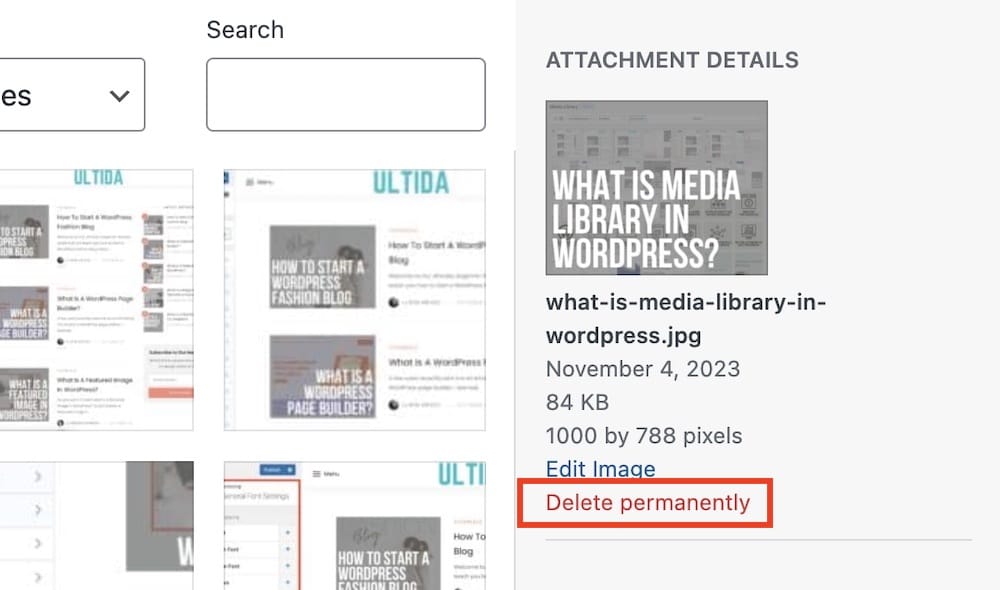
Need to say goodbye to a file? Click on it and hit “Delete Permanently” on the right.
But remember, in WordPress, there’s no “undo” button for this action. So, make sure you’re ready to let go.
Exporting Media From WordPress
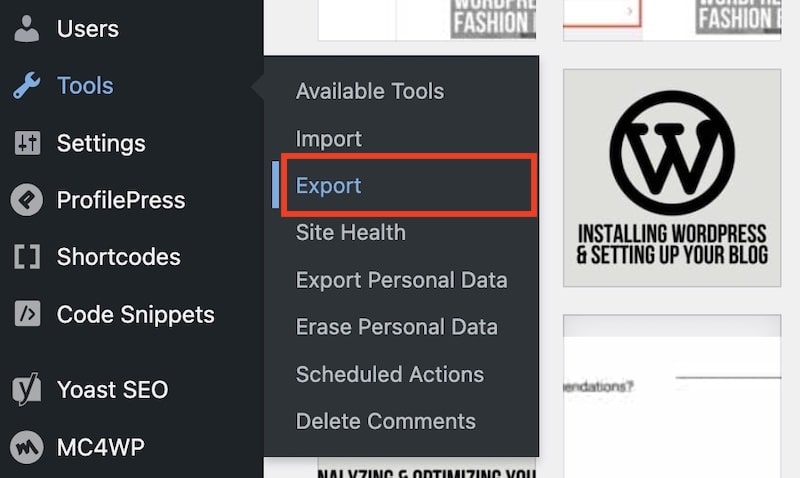
All you need to do is go to Tools > Export, which you can access from the left hand menu in your WordPress admin.
You’ll see options to export posts, pages, and more, but for now, we’re only inviting our media files on this trip.
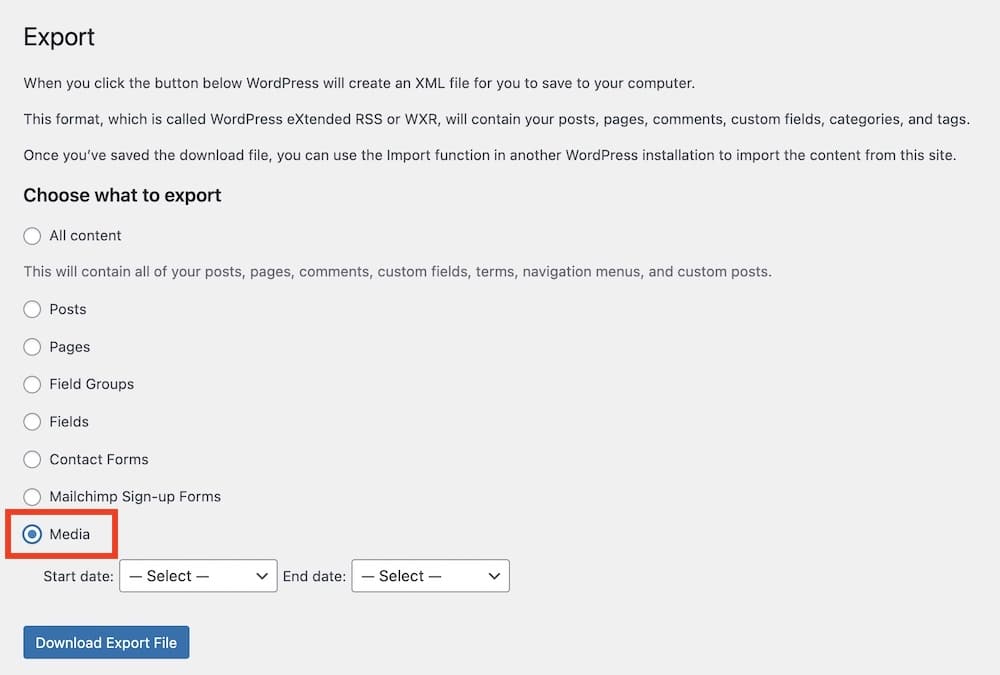
Pick a date range if you only want to export media from a certain time period.
Click “Download Export File.”
This will generate an XML file that contains all the URLs of your media files, but note, it does not include the actual media files themselves.
Best Practices For Using The Media Library
Navigating your WordPress media library can be like a walk in the park – peaceful and delightful – if you stick to some golden rules.
Here are my top tip to keep it neat all year round!
File Naming Conventions
Let’s talk about names, shall we?
Just like you wouldn’t name all your pets “Fluffy”, give your files unique, descriptive names.
Think “sunset-at-lake-tahoe.jpg” instead of “IMG_1234.jpg.”
This makes it easier to search for and identify files at a glance.
Optimal File Sizes & Formats For Web Use
Now, about those hefty files… A slow-loading website is as good as a party without music.
Keep your images lean with formats like JPEG for photos, PNG for graphics with transparency, and GIF for small, simple animations.
And for the love of quick loading times, resize your images to the maximum display size they need to be on your site.
Tools like Photoshop or free online image optimizers (hey, TinyJPG) can be your best pals here.
Regularly Updating & Maintaining The Media Library
Every now and then, put on your gardening gloves and prune your media library.
Update old images, replace outdated files, and delete the ones you no longer need. Regular maintenance keeps your media library as fresh as daisies.
Backing Up Your Media Files
Imagine if one day you walked into your digital park, and POOF, all the flowers were gone!
That’s what it’s like to lose your media files without a backup.
Use WordPress backup plugins or cloud services to keep a safe copy of your files.
Treat it like a time capsule, so if anything ever goes awry, you can restore your garden to its former glory.
By following these simple best practices, you’ll ENSURE that your media library is a thing of beauty and efficiency.
Common Media Library Issues & Troubleshooting
Even in the lush gardens of our WordPress sites, we sometimes stumble upon a few thorny issues.
Luckily, for every problem, there’s a solution, and I’m here to walk you through troubleshooting some common media library hiccups.
File Upload Errors
“Oops! Why won’t my file upload?” If you’ve ever scratched your head at this question, you’re not alone.
- Check file size limits: Your WordPress site has a size limit for uploads. If your file is too big, consider shrinking it or asking your host to expand your limits.
- File type not allowed: Make sure your file’s format is BFFs with WordPress. If it’s not, you might need to add the file type to your allowed list via a plugin or a wp-config.php edit.
- Permission issues: Sometimes, your site’s file permissions get a bit moody. Check with your host or peek into your server settings to ensure your permissions are set correctly.
Image Sizing & Cropping Issues
Ever uploaded an image and it’s got a mind of its own? Sizing and cropping gremlins can be sneaky.
- Regenerate thumbnails: If your images look warped, a plugin like Regenerate Thumbnails can redo your image sizes to fit perfectly into your theme.
- Check theme settings: Some themes are picky about image sizes. Double-check your theme’s recommended image dimensions and adjust your images accordingly.
- Clear caches: Sometimes, your browser or site cache holds onto old images. Clearing your cache can reveal the true look of your updated images. (It took me some time to figure this one out when I first started.)
File Organization Problems
“Where did I put that file?” If your media library is more “wilderness” than “well-ordered,” it’s time to tame it.
- Use descriptive names: When uploading, name your files with clarity – it’s like labeling seed packets for your garden.
- Folders & categories: Plugins can introduce a system of folders or categories to your Media Library, making organization a breeze.
- Consistent cleanup: Regularly prune your library, deleting unused files and keeping everything tidy.
How To Recover Lost Or Deleted Media
The digital equivalent of “My dog ate my homework!” can happen when media files go missing.
- Check the Trash: If you’ve recently deleted a file, WordPress might have stashed it in the Trash.
- Restore from backups: If you back up your site (and you should), you can restore lost files from there. It’s your safety net.
- Contact hosting support: If you’re still stuck, contact your hosting provider’s support. They can sometimes work magic from behind the scenes.
Dealing with Media Library issues is just part of the adventure of running a WordPress site.
But with a little bit of know-how and some troubleshooting skills, you’ll be back to smooth sailing in no time.
Conclusion: Master WordPress Media Library!
The media library is the heart of your visual content, pumping life into your website with images, videos, and files.
It’s the personal museum for all your media, beautifully displaying the visual story of your site.
Remember, a WELL-ORGANIZED media library helps you find what you need quickly, making your website management smooth and breezy.
Mastering the media library is like mastering a magical spell. It can make your content more accessible, your pages more engaging, and your website more attractive to visitors.
With the tricks and tips I’ve shared, you’re well on your way to becoming a media management wizard.
Your WordPress site is a canvas, and your media library is a palette of possibilities.
Embrace it, enjoy it, and let your creative juices flow!
FAQs About Media Library In WordPress
What is the WordPress media library?
The WordPress media library stores all your images, videos, audio files, and other media uploads. It serves as a central repository for managing and organizing your site’s multimedia content.
How do I add media to the WordPress media library?
To add media to the WordPress media library, go to your WordPress dashboard, navigate to Media > Add New, then either drag and drop files into the uploader or click the “Select Files” button to upload media from your computer.
Can I organize media files in the WordPress media library?
Yes, you can organize media files in the WordPress media library by using categories, tags, or folders (with plugins). You can also filter media by type, date, or keyword to find specific files more easily.
What types of files can I upload to the WordPress media library?
You can upload various types of files to the WordPress media library, including images (JPEG, PNG, GIF), videos (MP4, MOV, AVI), audio files (MP3, WAV), PDF documents, and more.
How can I edit images in the WordPress media library?
You can edit images directly within the WordPress media library by clicking on the image you want to edit and then selecting the “Edit Image” option. This allows you to crop, resize, rotate, and apply basic adjustments to your images without leaving WordPress.


