A WordPress slug briefly explains the content you have included in a page or post as part of the whole URL.
You are RIGHT to wonder what I just said actually means if you are just starting your WordPress journey.
We have all been WordPress and SEO beginners at some point.
But you’ll get the hang of it after a while. In this post, we are going to help you do it faster.

This post covers:
- What does slug mean in WordPress
- How to set a slug in WordPress
- Importance of WordPress slugs
- Difference between WordPress slug & permalink
- How to optimize WordPress slugs for SEO
- FAQs about WordPress slug
By the end of this read, you’ll know how to set up and optimize a slug for SEO.
What Does Slug Mean In WordPress

I always understand a term better when it is explained through an example.
So that’s what we are going to do.
Let us use one of our recent tutorials on WordPress.
A few days ago, we created a guide about WP sidebars, explaining what they are and how to create one for your WordPress website.
The permalink for that guide is: https://ultida.com/what-is-a-sidebar-in-wordpress/.
If we break that down, we can figure out what the slug is.
So, the “https://” is the protocol our site uses. After that, you’ll see the domain “ultida.com”.
What’s left is the slug.
In this case it is a brief explanation of the tutorial we created: “what-is-a-sidebar-in-wordpress.”
WordPress generates the slug automatically after you create a new post.
But this is not always beneficial when it comes to SEO.
For this reason, WordPress professionals manually change the slugs of posts and pages.
And that’s EASIER than you think!
How To Set A Slug In WordPress
It becomes clear that a well-crafted slug helps both search engines and your readers understand what your post or page is about.
Therefore, although the WordPress algorithm is quite intelligent, you should not always rely on its automatic slug generation.
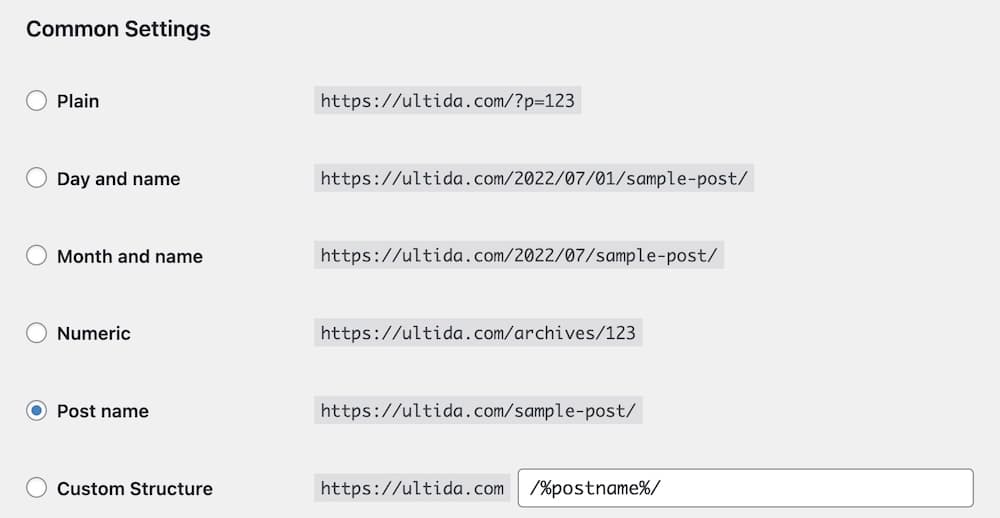
But first, you need to switch from the default “Plain” permalink structure to “Post name.”
Why? Because it’s automatically more SEO-friendly.
You change by going to Settings > Permalinks.
But how can you manually set a slug in WordPress?
Well, you first need to determine the type of slug you want to change.
In other words: Do you want to set a slug for a post, a page, a category or a tag?
Although the process is pretty similar, there are a few differences.
WordPress Post & Page Slug
Setting WordPress post slugs up or editing them after you’ve published a post is effortless.

From your WordPress dashboard, go to Posts. If you need to change an existing slug, go to All Posts.
Find the post you want to change the slug for and click on Edit (block editor).
From the Settings drop-down menu on your right, you should click on Post and find the Permalink category.
There, you will see the URL Slug section. All you need to do is type in the new slug and you’re all set.
Note: Be SURE to add dashes between the words (instead of spaces) and use only lowercase characters.
If you are about to create a new WordPress post, you must follow the same process.
After you insert the title, you can find the automatically created slug in the URL Slug section.
The same is true for WordPress page slugs.

The only difference is the first step of the process.
From the WordPress dashboard, go to Pages > Add New or All Pages > Settings > Page > Permalink > URL Slug.
WordPress Category & Tag Slug
For category and tag slugs, the process is a bit more complicated.
But do not worry! We are here to simplify it.
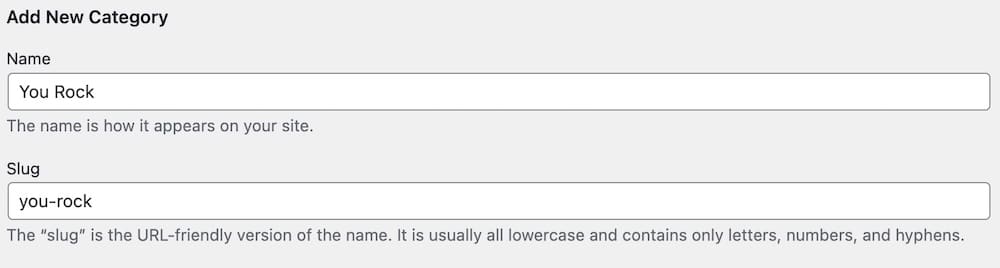
The difference between categories and tags is that you can not change the slug directly when you create a new one.
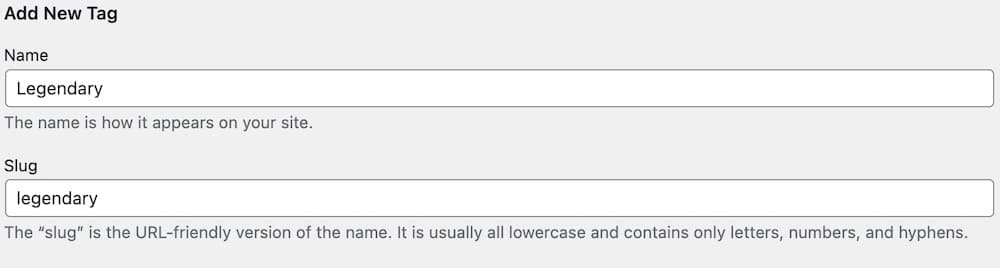
You have to create a category or tag first and then change the slug. All you need to do is:
From the WordPress dashboard, go to Posts
Below the Add New, you will find the Categories and Tags. Select the one you’re about to set up a slug for.
Find the category or tag you need from the menu and click on Edit (block editor).
Once you’ve opened the category or tag page, go to Settings (the gear icon) > Page > Permalink > URL Slug
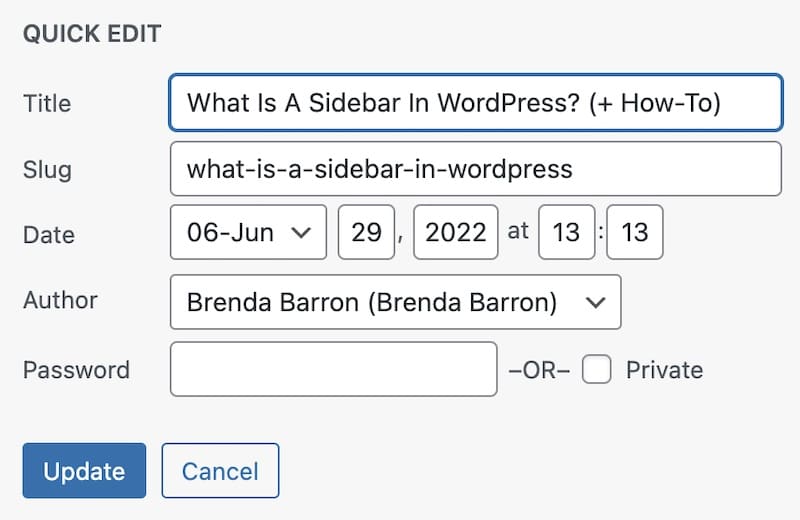
Bonus: Edit Slugs Quickly!
This is the fastest way to edit post, page, category or tag slugs.

You’ll see a bunch of options appear if you hover over the post.
Click the “Quick Edit.”
You can edit the slug from here directly and hit the Update button.
That’s all it takes!
Importance Of WordPress Slugs
Understanding WordPress slugs can truly be a game-changer. Let’s check why they are such a big deal:
Role In URL Structure
A clean, descriptive slug makes for a neat and tidy URL that’s easy to understand. Think of it as giving your webpage a name tag that says, “Hello, I’m about this topic!”
It’s the part of the URL that tells both users and search engines what the page is about.
Impact On SEO
If you want to get your website noticed by search engines (and who isn’t?), slugs are your secret weapon.
Search engines, like our pal Google, love it when URLs are clear and descriptive.
It helps them understand what your page is about, making it more likely for your page to appear in search results when people look for topics you’ve written about.
So, a well-crafted slug can truly be your ally in climbing up those search engine rankings.
User Experience & Readability
A good slug isn’t just for the search engines; it’s for people, too.
When potential visitors see a clear and descriptive URL, they’re likelier to click on it. It’s like having a storefront with a big, welcoming sign.
People know what to expect and feel more comfortable stepping in. Plus, a simple URL is just easier to remember, making it more likely for visitors to come back. It’s a win-win!
Difference Between WordPress Slug & Permalink
You can think of a WordPress slug as the endpoint, a summary, of a WordPress permalink.
Each WordPress link contains the protocol and the domain name.
After that, a permalink may (or may not) contain the category of the post.
But whether it does or not, the slug is always the last part of a WordPress permalink.
- Permalink: the full URL of a WordPress post, page, category, or tag.
- Slug: Just the last part of that URL.
However, one question remains: Why should you set up and optimize your WordPress slugs?
How To Optimize WordPress Slugs For SEO
A slug is MORE than just a URL ending.
A well-designed slug can influence your ranking and improve your SEO in general.
Because you know what’s a slug and how to change it you’ll easily optimize it for SEO.
The WordPress slug basics for SEO are just two: Be consistent and focus on the following two elements.
1. Target Your Keyword
One thing (most important) you should never forget about your WordPress slug is that it should contain the page’s target keyword or post.
If we use the same example as above for WordPress sidebars, you can see that the slug we used contains both our focus keywords (sidebar and WordPress).
This helps search engines understand your article and rank it for that particular term.
You may also be interested in reading our tutorial on how to rank new WordPress content faster.
2. Keep The Slug Simple
At the same time, your slug should be simple and short (unless you target a long-tail keyword).
Think of it as a quick CTA (call-to-action) that explains why your page/post is valuable to your readers.
Keep it short and self-explanatory.
Instead of “7-benefits-of-becoming-a-pirate-you-didnt-know-about,” keep it “benefits-of-becoming-a-pirate” – because it’s better!
(Sorry, this is probably the worst example I could come up with.)
And that’s it.
Now YOU ARE READY to create optimized WordPress slugs and improve the performance of your posts and pages!
FAQs About WordPress Slug
What is a WordPress slug?
A slug is the part of a URL that identifies a particular page on a website in a readable form. For example, in the URL “http://example.com/my-post,” the slug is “my-post.”
How do you change a slug in WordPress?
You can change a slug in the WordPress editor. Look for the Permalink section above the post editor, click the Edit button next to the URL, and type your desired slug.
Why is the slug important for SEO?
Slugs are crucial for SEO because they help search engines understand what the page is about. A well-crafted slug can improve your website’s search engine rankings and attract more clicks.
Can a WordPress slug include special characters?
Generally, it’s best to avoid special characters in slugs. WordPress automatically cleans it up, converting special characters to dashes and removing symbols to ensure the URL is web-friendly.
What happens if two posts have the same slug?
WordPress won’t allow two posts to have the exact same slug. If you try to give a post a slug that’s already in use, WordPress will add a number to the end to differentiate it, like “my-post-2.”