Do you want to learn how to schedule posts in WordPress?
If you’re like me, you’re juggling many tasks — writing content, managing social media, or even running a business on the side.
And let’s be honest, life doesn’t always operate in neat little blocks of free time where we can sit down and hit that “Publish” button exactly when we want to.
That’s where the magic of post scheduling comes in.
You’ve probably heard of this handy WordPress feature but might wonder, “Why should I bother with it?”
Well, stick around because we’re diving into not just the “HOW” but also the all-important “WHY” of scheduling posts in WordPress.
Trust me, this feature is a lifesaver for maintaining consistency, ensuring quality, and even getting that much-needed beauty sleep.
This post covers:
- The importance of scheduling posts in WordPress
- How to schedule a WordPress post in Block Editor
- How to schedule a WordPress post in Classic Editor
- How to schedule a WordPress post with a plugin
- Troubleshooting common WordPress post scheduling issues
- Additional tips to make WordPress post scheduling more effective
- Conclusion: Master post scheduling!
- FAQs about scheduling posts in WordPress
The Importance Of Scheduling Posts In WordPress
Ah, the freedom to publish anytime, anywhere, without even having to be online — sounds like a dream.
Well, it’s more attainable than you think!
Before we dive into the step-by-step guide, let’s take a moment to talk about why you should even consider scheduling your posts.
After all, understanding the “WHY” often makes the “HOW” so much easier, right?
1. Consistency: The Secret Sauce For Engagement & SEO
We all know consistency is key when blogging or running a website.
Your audience expects FRESH content, and search engines (hello, Google!) REWARD it.
With scheduling, you can set up a string of posts to go live at specific intervals, ensuring you remain relevant and memorable.
2. Time Management: Your New Best Friend
If you’ve ever felt like there aren’t enough hours in the day, you’re not alone.
Writing, editing, and publishing can consume a lot of time. I FEEL you.
But what if you could knock out several posts in one productive afternoon and have them automatically go live throughout the week or month?
Scheduling to the RESCUE!
3. Flexibility: Because Life Happens
Let’s face it: Life is unpredictable.
Maybe you are suddenly inspired to write at midnight or want to take a spontaneous trip.
Scheduling posts gives you the flexibility to live your life without being tethered to your publishing calendar.
Your website stays updated, and you enjoy that last-minute beach getaway.
4. Catering To Different Time Zones: The World Is Your Audience
Ever thought about how your 9 AM could be someone else’s middle of the night?
With a global audience, finding the perfect time to publish can be tricky.
Scheduling lets you cater to different time zones, increasing the likelihood that AS MANY eyeballs will see your posts as possible.
Friendly tip: I don’t suggest you stress too much over the different time zones. I usually publish the article when I have it ready for publishing.
How To Schedule A WordPress Post In Block Editor
Ready to learn the easy-peasy way to schedule posts in the WordPress Block Editor?
I promise you, once you get the hang of this, you’ll wonder how you ever blogged without it.
Step 1: Get Into Your WordPress Dashboard
Log into your WordPress dashboard.
Head to the “Posts” section and click “Add New.”
If you’re not new to this, you know the drill. But if you are, no worries, you’re doing great so far.
Step 2: Create Your Awesome Post
Ah, the blank canvas! Go ahead and pour all your creativity into it.
Write your content, add images, throw in some links—make it as fabulous as you are.
If Gutenberg’s blocks puzzle you a bit, think of them as LEGO pieces.
Each block is a component (a paragraph, an image, a heading, etc.) that you can easily add or move around.
Step 3: Locate the Publish Settings
Finished crafting your masterpiece? Awesome!
Now, look to the top-right corner of your screen.
You’ll see a section that reads “Publish,” “Save Draft,” or even “Submit for Review,” depending on your role.
This is your go-to spot for all things publish-related.
Step 4: Choose the Publish Date and Time

Click the “Immediately” button next to the “Publish” section to open the calendar.
This is where you can pick the exact date and time you want your post to see the light of day.
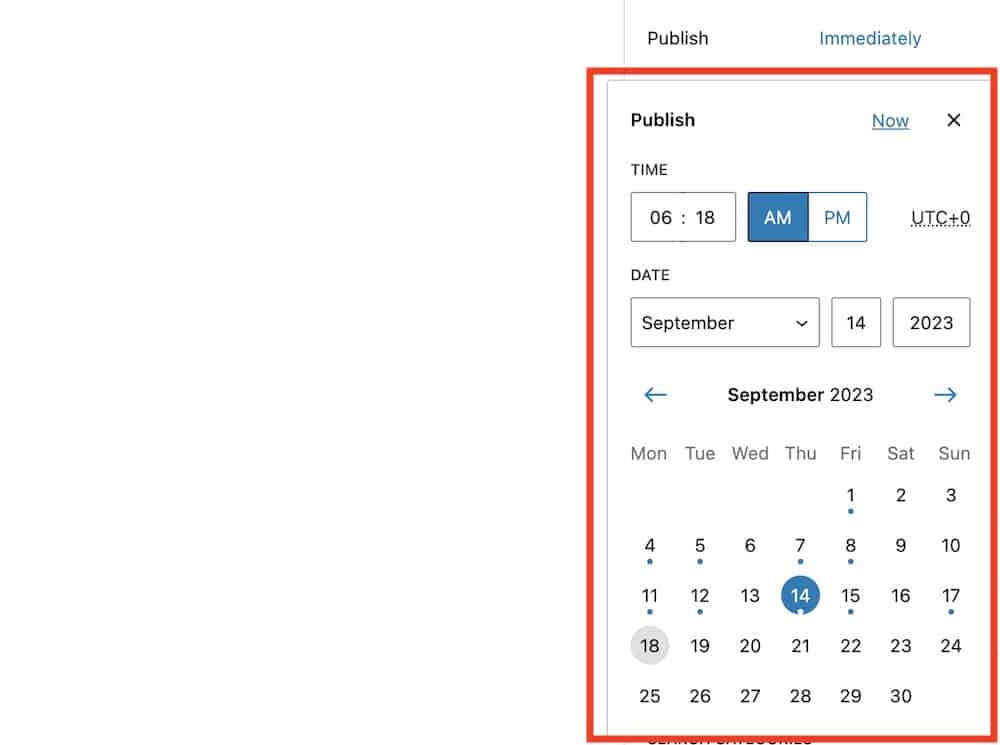
Just set your desired date and time, and you’re almost there!
It should look something like this:
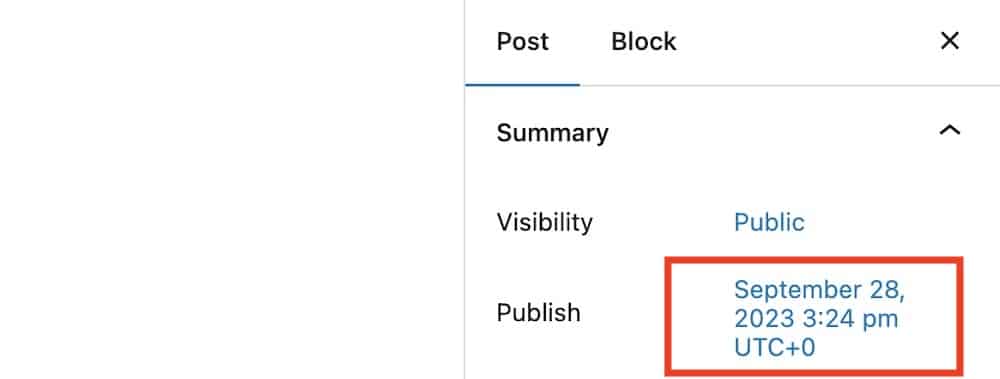
Step 5: Confirm and Save
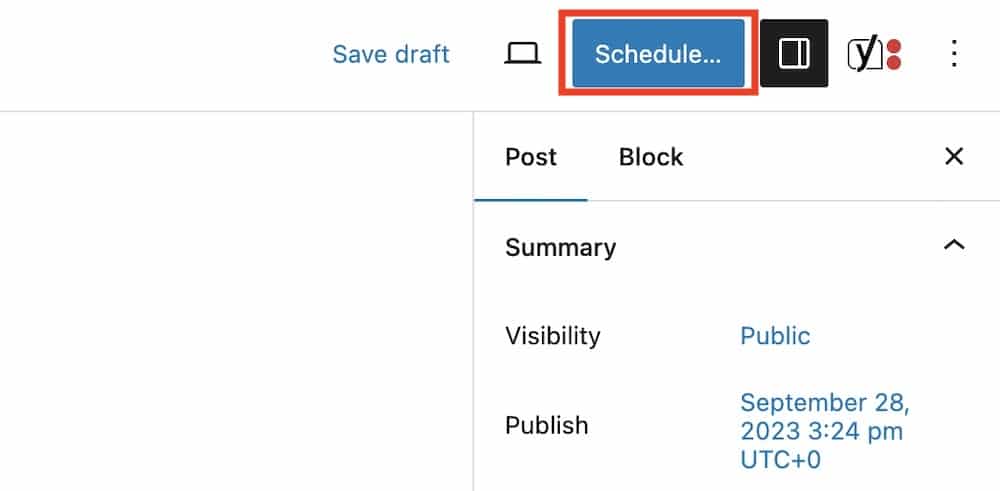
Here comes the most satisfying part—clicking that “Schedule” button.
You’ll see it replace the “Publish” button once you’ve set a future date and time.
Hit that baby, and voila. You’ve just scheduled your post.
Step 6: High-Five Yourself
Give yourself a well-deserved high-five! You’ve successfully scheduled your post, and now you can enjoy that piña colada, take a nap, or binge-watch your favorite series.
Thanks to your newfound scheduling skills, your post will go live even if you’re off doing something else.
How To Schedule A WordPress Post In Classic Editor
So you love the simplicity and familiarity of WordPress’s Classic Editor, huh? (I enjoy it, too.)
Well, who could blame you?
But did you know you can schedule your posts just as easily here as you can in the newfangled Block Editor? That’s right!
While you’re wrapped up in the comfort of the Classic Editor’s interface, you can also make your life even easier by automating when your posts go live.
Step 1: Access Your WordPress Dashboard
If you’re reading this, chances are you’re no stranger to the WordPress Dashboard.
So go ahead and log in, then navigate to “Posts” and click on “Add New.”
You’re now in your happy place, ready to create.
Step 2: Unleash Your Creativity
Here’s your blank canvas in the Classic Editor. Feels like home, doesn’t it?
Write your heart out, insert images, drop those links – make it uniquely you.
Step 3: Spot the Publish Box
Now, eyes to the right!
There’s a box labeled “Publish.” This is your mission control for scheduling posts.
Normally, you’d click the “Publish” button to make your post live right away, but not today.
Step 4: Pick Your Date and Time
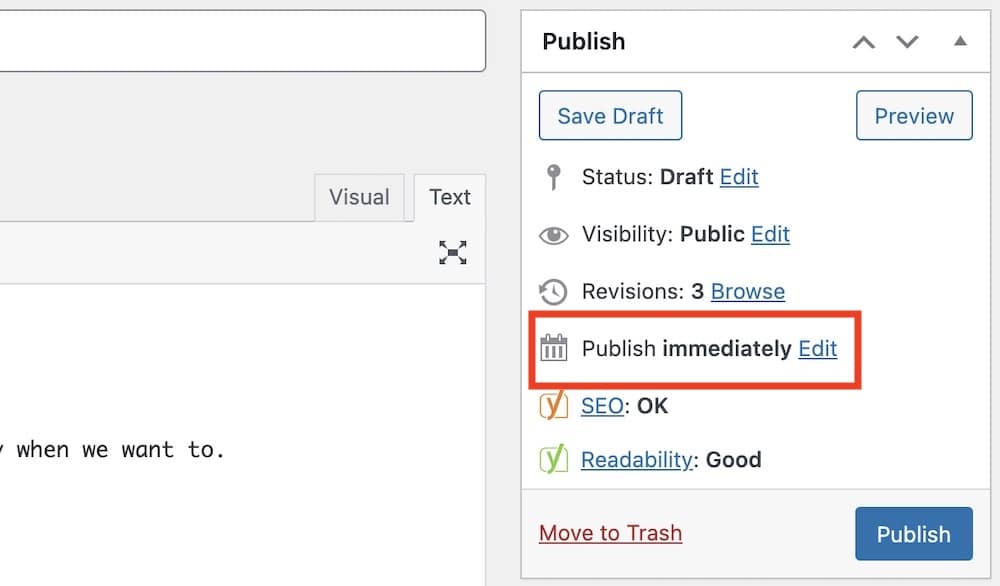
See where it says “Publish immediately“? Click the “Edit” link right next to it.
This gives you options to choose a date and time for your post to go live.
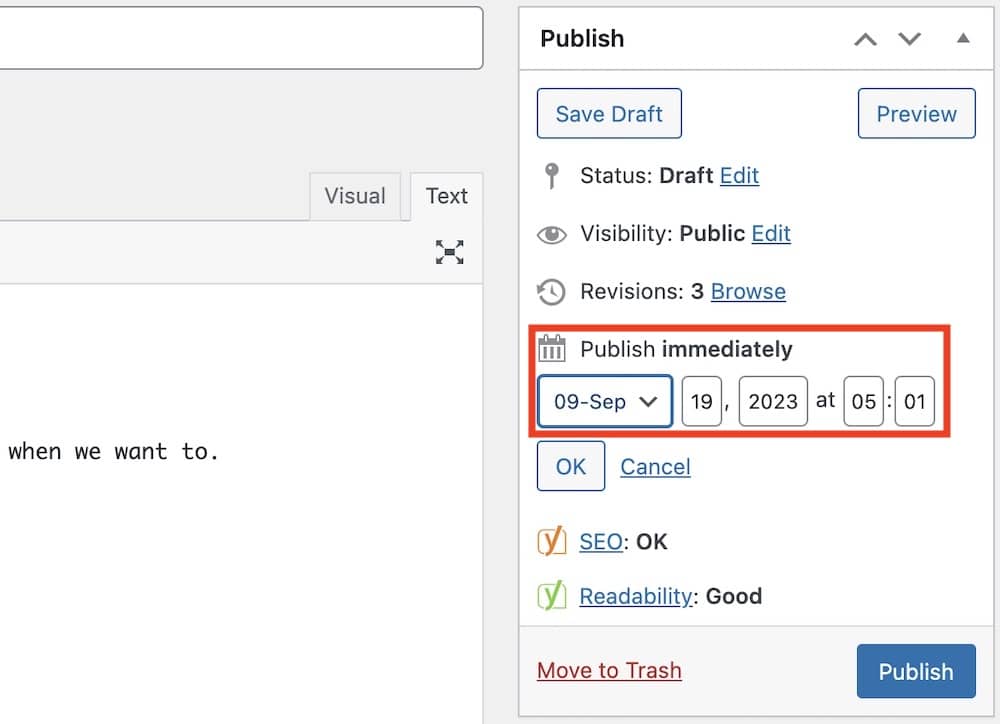
Pick your preferred day and time and then click “OK.”
Step 5: Hit ‘Schedule’ and Do a Happy Dance
Once you’ve set the date and time, the “Publish” button transforms into a “Schedule” button.
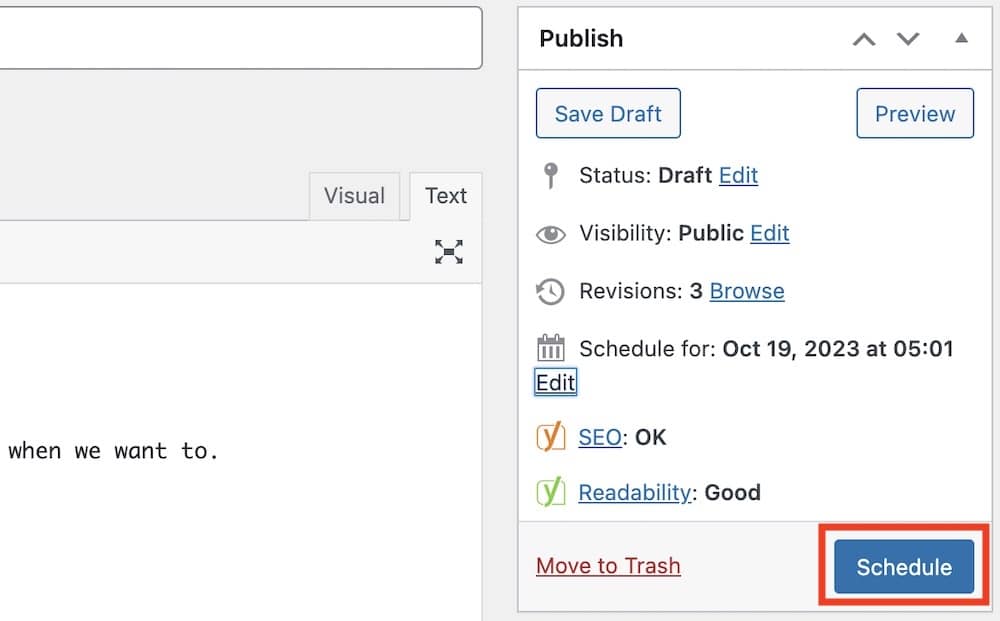
Click it!
Your post is now set to go live at the time you chose.
Take a moment to bask in your awesomeness and maybe do a little happy dance – you’ve earned it.
How To Schedule A WordPress Post With A Plugin
Sure, WordPress’s built-in scheduling features are pretty neat, but what if you want more control, flexibility, or just some extra bells and whistles?
That’s where WP plugins come into play, my friends.
I’ll guide you through how to schedule your WordPress posts using plugins, focusing on two superstars: SchedulePress and Editorial Calendar.
SchedulePress: The Schedule Whisperer
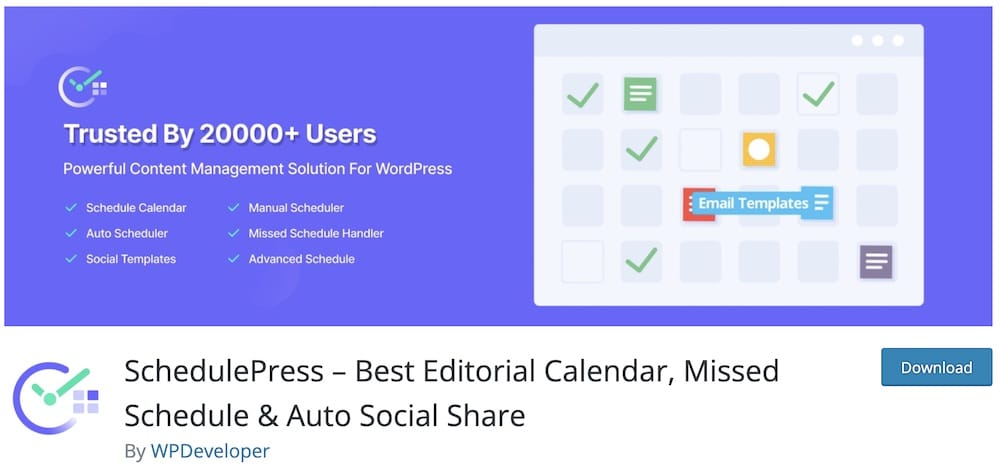
SchedulePress is like your personal scheduling assistant that never sleeps.
From auto-scheduling your drafted posts to enabling social media sharing right as your post goes live, this plugin is all about making your life easier and more organized.
Editorial Calendar: The Visual Maestro
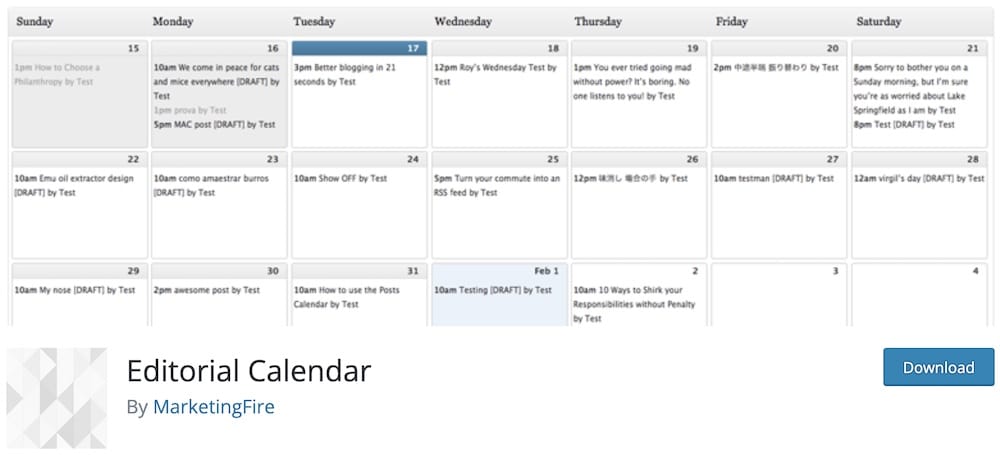
If you’re a visual thinker, you’ll love Editorial Calendar.
This plugin gives you an overview of your posts in a calendar layout, allowing you to easily drag-and-drop posts to different days.
It’s like having a bird’s-eye view of your entire content schedule. So. Convenient.
Step 1: Plugin Installation and Activation
Hop onto your WordPress Dashboard and navigate to “Plugins” > “Add New.”
Search for either SchedulePress or Editorial Calendar, click “Install,” and then “Activate” that bad boy!
Note: You can also go through Ales’s extensive guide on how to install a WordPress plugin.
Step 2: Access the Plugin’s Dashboard
Once activated, each plugin usually adds a menu item to your WordPress Dashboard (in the left sidebar).
For SchedulePress, it’s typically under “Posts,” and for Editorial Calendar, you’ll find it when you click on “Posts” and then “Calendar.”
Step 3: Setting Up Your Schedule
- For SchedulePress: Go through the settings to set up your auto-scheduling preferences, time slots, and more.
- For Editorial Calendar: Simply start dragging and dropping your posts onto the calendar to schedule them.
Step 4: Extra Features Galore
Both plugins offer extra features like social media sharing, post previews, and more.
Dive into these to really supercharge your scheduling prowess.
Step 5: Hit Save and Breathe Easy
Once you’ve set everything up, make sure to save your settings.
Your posts will now be scheduled based on your chosen parameters, giving you more time for whatever you like.
Troubleshooting Common WordPress Post Scheduling Issues
We’ve all been there – you’ve got your post all ready to go, scheduled to the minute, and then… something goes awry.
Trust me, it happens to the best of us.
But hey, don’t sweat it!
I’m here to guide you through some common pitfalls of WordPress post scheduling and how to troubleshoot them like a pro.
Post Didn’t Publish On Time: The Tardy Troublemaker
So you set your post to go live at 9 AM sharp, but it’s 9:15, and nothing’s happened. Don’t panic!
- Check your internet connection: Ensure your server’s internet connection runs smoothly. Sometimes glitches happen.
- WP Cron: WordPress uses a WP-Cron system to handle scheduled tasks. WP Cron might not trigger on time if your site has low traffic. You can use plugins like WP Control to run scheduled tasks manually.
- Cache & conflicts: Cache plugins or even some security plugins can interfere. Clear your cache, disable plugins temporarily, and try again.
Time Zone Discrepancies: When Your Post Travels Through Time
You’re in New York, but your post thinks it’s in San Francisco. Time zones can be tricky.
- Check WordPress time settings: Navigate to your WordPress Dashboard, then go to “Settings” > “General” and check your time zone setting.
- Server time zone: Sometimes, the server’s time zone might conflict with your WordPress settings. If possible, make sure both are aligned.
Scheduled Post is Stuck in ‘Scheduled’ Status: The Eternal Wait
It’s past the publishing time, but your post is still “scheduled.”
- Refresh: A simple dashboard refresh or logout-login can do the trick.
- Database issue: It could be an issue with your database; checking your server logs for errors can provide more insights.
- Update WordPress: Updating to the latest version can solve many issues if you’re using an outdated version. (See how to update WordPress.)
Un-Scheduling a Scheduled Post: The Take-Back
Changed your mind? Want to hold that post back for some more editing?
- Edit the post: Open the post in the editor (Classic or Block, depending on your preference).
- Change status: For Classic, locate the “Publish” box on the right, click “Edit” next to the scheduled time, and change it back to “Draft.” In Block Editor, you’ll find this option under “Status & Visibility” on the right-hand panel.
- Update/save: Don’t forget to update the post or save the draft.
Additional Tips To Make WordPress Post Scheduling More Effective
If you’re looking to really get the most out of your content game, I’ve got some extra tips for you.
Let’s sprinkle some more magic on your scheduling prowess, shall we?
Use a Content Calendar For Better Planning
Thinking ahead is the name of the game in blogging.
A content calendar helps you plan your posts, track your ideas, and even keep tabs on those all-important special events and holidays.
- Pick your platform: You can go old-school with a physical calendar, use a spreadsheet, or opt for specialized software like CoSchedule.
- Mark important dates: Note down holidays, special events, or industry-specific dates your audience would be interested in.
- Plan your posts: Use this calendar to plan your posts well in advance and ensure a consistent posting schedule.
Test Different Publishing Times
You wouldn’t host a party when everyone’s asleep, right? The same principle applies to publishing posts.
- Experiment: Try posting at different times and days to gauge when your audience is most active.
- Analyze data: Use analytics tools to track engagement metrics like views, likes, and shares.
- Fine-tune: Based on your findings, refine your schedule to hit those peak audience times.
Preview the Post Before Scheduling
Do you leave the house without checking the mirror? Probably not. (Or maybe you do, you daring soul, you!)
- Hit preview: Whether you’re using the Classic or Block Editor, both offer a “Preview” button. Use it.
- Check everything: Look at formatting, images, links, and even those sneaky typos that managed to evade you the first time around.
- Mobile check: Don’t forget to check how your post looks on mobile devices. A large chunk of your audience might be reading from their phones.
Conclusion: Master Post Scheduling!
From the basics to troubleshooting and even some pro tips, we’ve covered the ins and outs of scheduling posts in WordPress.
I hope you’re feeling more empowered to take control of your publishing schedule like the rockstar you are.
Why Scheduling Rocks
Just to hit the high notes one more time:
- Consistency: Scheduled posts mean a consistent posting schedule, which your audience and those Google algorithms love.
- Time management: Automate your publishing and free up time for other important tasks (or, you know, Netflix).
- Flexibility: Got a burst of inspiration? Write multiple posts and schedule them to keep your content fresh and engaging.
A Quick Recap of the Steps
- Navigate to post editor: Choose your preferred editor—Classic or Block.
- Create your post: Unleash your creativity and craft your masterpiece.
- Set the time: Pick the ideal date and time for your post to go live.
- Hit Schedule: Confirm, and let WordPress do the rest.
Optional but awesome:
- Use plugins: SchedulePress and Editorial Calendar are your friends for enhanced features.
- Troubleshoot: If things go south, you’re now well-equipped to deal with common issues.
- Additional tips: Use a content calendar, experiment with timing, and preview before committing.
I hope this guide has been your trusty roadmap to master post scheduling.
FAQs About Scheduling Posts In WordPress
How do I schedule a post in WordPress?
To schedule a post, create your content in the WordPress editor as usual. In the publish meta box, click on the “Immediately” text next to “Publish” and select the date and time you want the post published. Then, click “Schedule” to set your post to be published automatically.
Can I change the scheduled time after I have set it?
Yes, you can change the scheduled time. Go to your post editor, find the publish meta box where the scheduled time is displayed, click on the date and time, adjust it to your new preferred schedule, and then click “Update” to save the changes.
What happens if I miss the scheduled time for a post?
If your WordPress site misses the scheduled time (perhaps due to a server issue or the site being offline), the post will not be published until the site is accessed again. Once the site checks in, WordPress will publish the missed schedule as soon as possible. In rare cases, you’ll need to do it manually.
Can I see all my scheduled posts in one place?
Yes, you can view all scheduled posts by going to the WordPress dashboard, clicking on “Posts,” and then selecting the “Scheduled” link in the top menu where posts are filtered by status (All, Published, Draft, etc.).
Is there a limit to how many posts I can schedule in WordPress?
The number of posts you can schedule in WordPress is unlimited. Depending on your content planning needs, you can schedule posts as far into the future as you like.


