Are you looking for the best guide to learning how to create a multilevel or hierarchical WordPress menu?
As a website owner, you understand that user experience is of utmost importance.
If visitors can’t easily navigate your site, they’ll quickly leave and look for better alternatives.
Creating a hierarchical WordPress menu is one of the best ways to IMPROVE user experience.

This post covers:
- What is a multilevel menu?
- How to create a multilevel WordPress menu
- Tips for optimizing your multilevel WordPress menu
- Plugins for creating advanced hierarchical menus
- Do you need a multilevel navigation?
- FAQs about creating a multilevel/hierarchical WordPress menu
In this ultimate guide, I’ll cover everything you need to know about creating a multilevel menu, including why it’s important, how to do it, and optimization tips.
Before we continue, I’d also like to inform you that I put together a step-by-step guide on creating a multi-column WordPress menu, too.
What Is A Multilevel Menu?
A website menu is the primary way visitors navigate your site.
It’s typically located at the top or side of the page and includes links to the most important pages.
A hierarchical menu is a type of menu that has multiple levels, with submenus and drop-downs that offer more specific options. (If you’re new to these phrases, you may also be intersted in reading what is a drop-down menu.)
It’s an excellent way to ORGANIZE a large amount of content and make it easier for users to find what they’re looking for.
A multilevel menu allows you to group related content and create a logical structure (ranging it into categories and subcategories) that guides users through your site.
A solid user experience BOOSTER, if you will.
Benefits Of Using A Multilevel Menu
There are several benefits to using a multilevel menu on your website:
- It makes it easier for visitors to find what they’re looking for.
- Your content will be organized in a logical and easy-to-understand way.
- Improve your site’s SEO by creating a clear hierarchy of content.
How To Create A Multilevel WordPress Menu
WordPress has a built-in navigation menu system that allows you to create and customize your site’s menu.
You can access the menu editor by going to Appearance > Menus in your WordPress dashboard.
From there, you can create new menus, add pages, categories, and custom links, and arrange the menu items as you see fit.
Before you start creating your multilevel menu, you need to decide on the PROPER structure.
Think about the content on your site and how you want to organize it.
You can create a menu that follows your site’s hierarchy, with main categories and subcategories, or you can create a menu based on the most popular content.
Creating a multilevel WordPress menu requires a BIT MORE effort than a basic hierarchical menu, but it’s still easy to CREATE.
There are two main methods to create a multilevel menu: 1) using the WordPress menu editor and 2) using the theme customizer.
1. Create A Multilevel Menu Using The WordPress Menu Editor
To create a multilevel menu using the WordPress menu editor, first head to Appearance > Menus in your dashboard.
Check if all the elements are enabled by clicking the Screen Options button in the top right corner of the page.
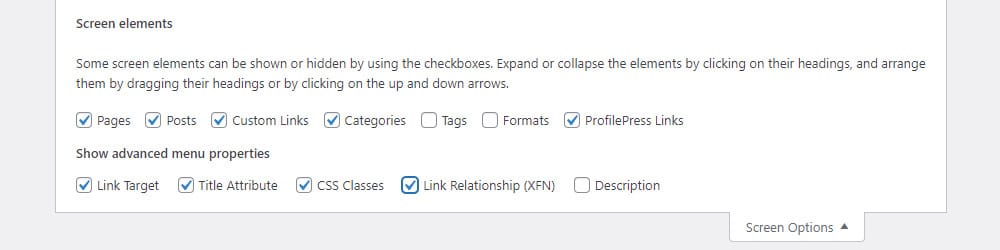
It’s best to check all the boxes except the description box.
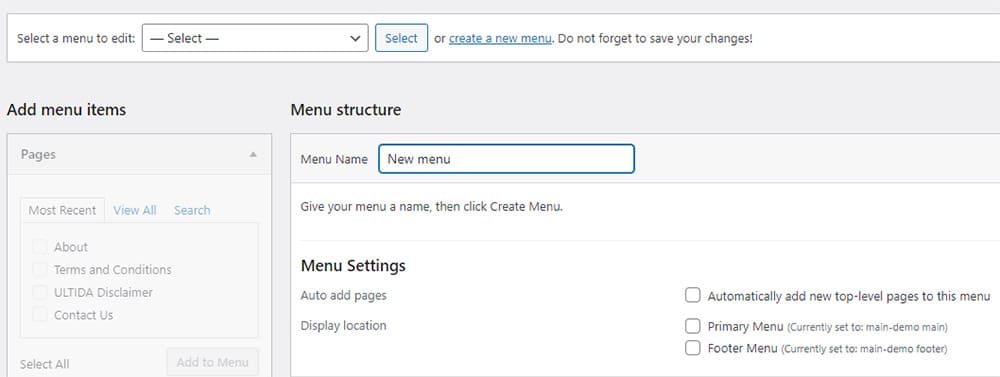
Now create a new menu by following these simple steps:
- Click on the Create a new menu button.
- Enter the menu with a proper name, especially if you intend to have more menus.
- Click on Create Menu button.
- Assign our newly created menu to the Main/Primary Menu by checking on the checkbox at the Display location part.
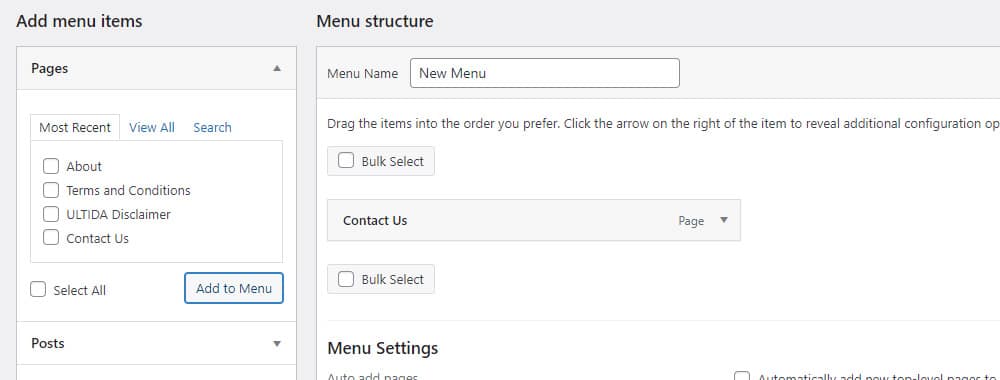
Creating A Menu Item
Adding a new item to your new menu is as easy as creating it.

- Click on the checkbox beside the menu item that you want to add.
- Now click the Add to Menu button and then the Save Menu buttons.
- Repeat this step until you add all the items that you want.
- You’re done; the new menu should now already be visible on your website.
As you can see, creating a menu is very easy and can be done within minutes.
But now, I would like to take it a step further and create submenus to make a hierarchical distinction.
Create and Add Sub Menu Items
Even if you have a very simple blog, this will always come in HANDY.
For instance, you will probably still have multiple subcategories (like fashion, lifestyle, cooking, etc.) for your blog posts so they are better organized and easily accessible to your visitors.
Now we can proceed to create sub-menu items.
You can simply REPEAT the steps above to add menu items to the actual menu.
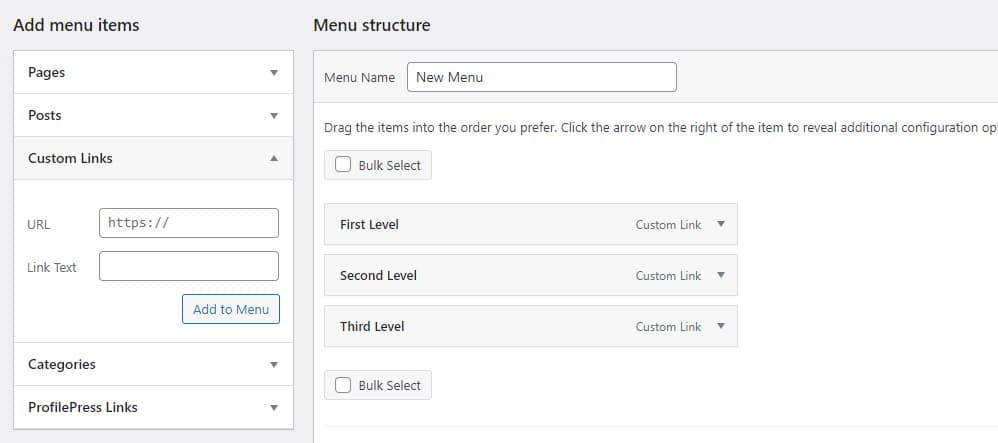
All your submenu items should now be on the right side.
Now drag & drop them to the appropriate positions:
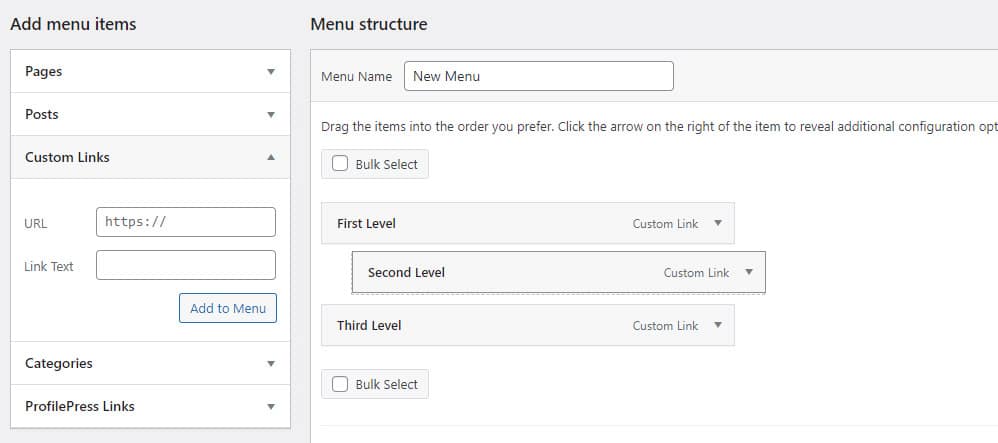
It is very intuitive – just click and hold a menu item and drag it to a new position before releasing the mouse button to drop it in place.
Now do that for the third sub-menu item as well.
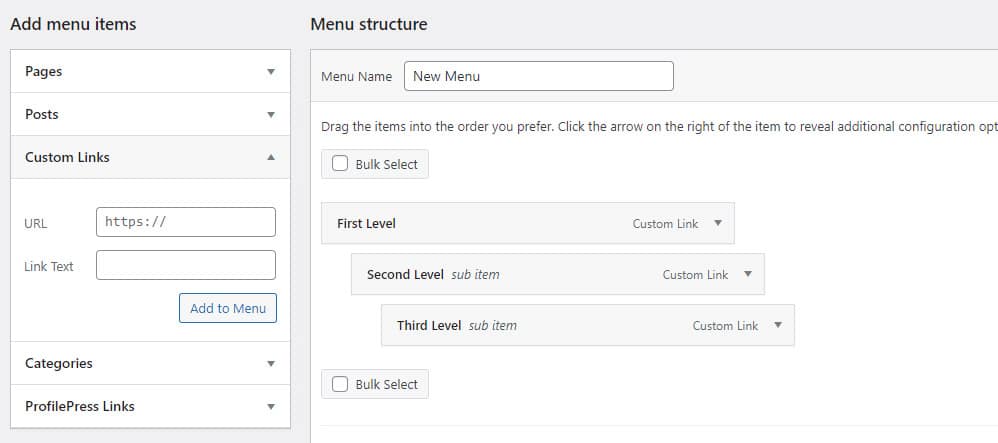
After you add all the menu items you need, click the Save Menu button, and your new multilevel menu is ready for your visitors to benefit from.
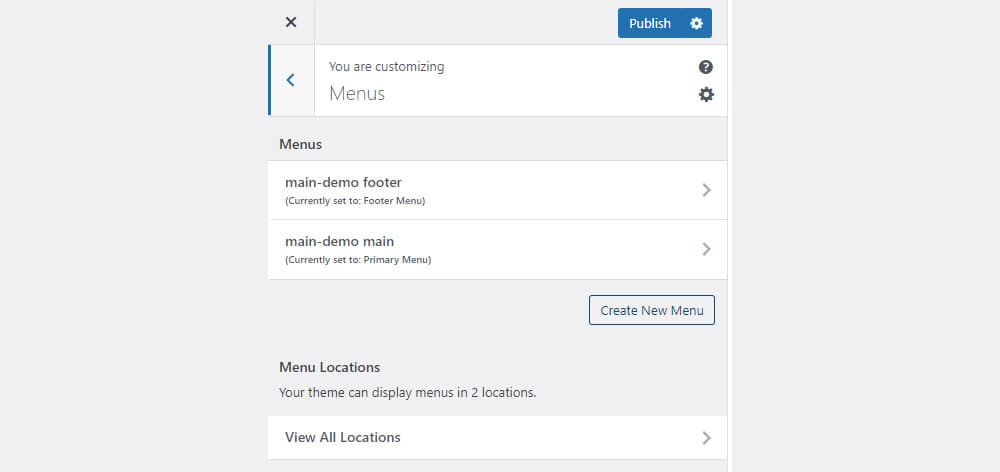
2. Create A Multilevel Menu Using The Theme Customizer
Now, let’s also use the WordPress Theme Customizer to set up your menu structure.
Head to your WordPress admin dashboard and then click Appearance > Customize > Menus.
Click on the Create New Menu button to start.
Name the menu, click the next button, and then Add items.
This will open a sidebar with all your website’s pages, posts, categories, and other elements.
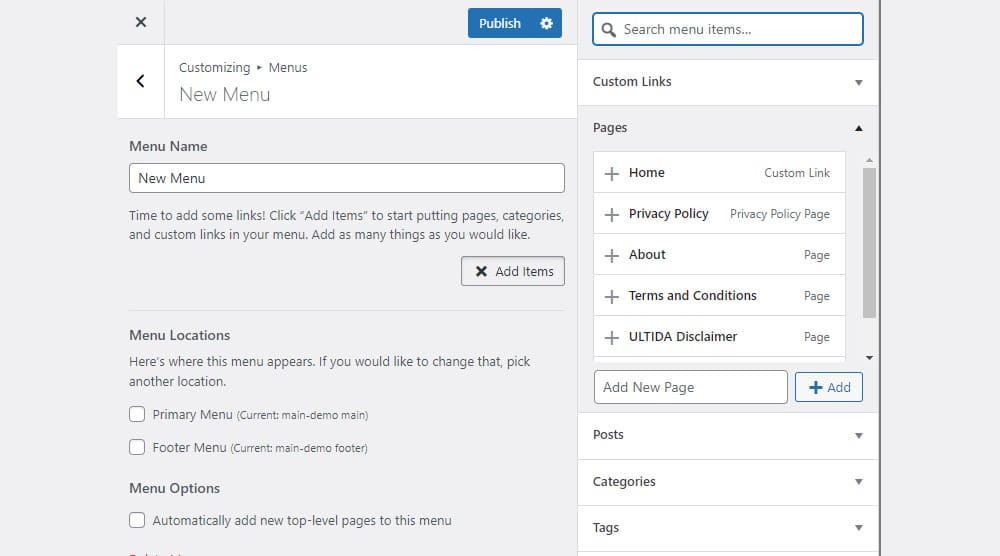
Add the elements to the menu by clicking on them (or the plus icon).
You can arrange the menu items into multilevel by clicking the Reorder button.
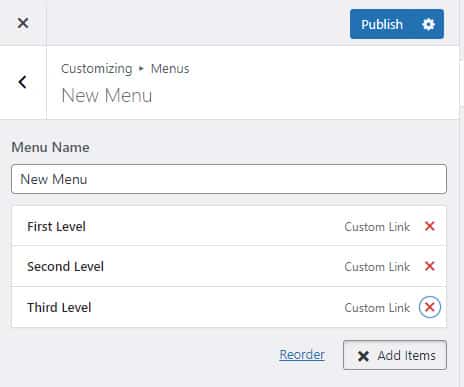
Click the arrows next to the menu label to arrange them into a hierarchical structure as you wish.
![]()
Click the Publish button, and your brand new menu is live and ready to improve your website’s UX.
Tips For Optimizing Your Multilevel WordPress Menu
To optimize your multilevel WordPress menu, follow these tips:
- Keep it simple and organized.
- Use clear and descriptive labels for your menu items.
- Use a logical hierarchy to group related content.
- Limit the number of menu items to make it easy to navigate.
- Test your menu on different devices to ensure it’s mobile-friendly.
Plugins For Creating Advanced Hierarchical Menus
If you want to create an advanced hierarchical menu with more features, there are several plugins you can use.
The three solutions I recommend (I use them regularly) are UberMenu, Max Mega Menu, and WP Mega Menu. (If you decide to choose this path, check how to install a WordPress plugin first.)
Expanded hierarchical multi-menus are mainly used on large websites (online stores and news portals) to help visitors QUICKLY navigate to their desired content.
A mega menu may also contain other types of content, like a search bar, images or videos, and other interactive elements that a normal multilevel menu doesn’t have by default.
Note: I also create a full tutorial on how to create a mega menu in WordPress.
So if you need a more COMPLEX multilevel menu with extra features and a flashy design, plugins are definitely the way to go.
Conclusion: Do You Need A Multilevel Navigation?
In conclusion, a multilevel navigation menu is an essential feature for any website with a lot of content.
It allows you to organize your content logically and easily, making it easier for visitors to find what they’re looking for.
With the tips and techniques I outlined in this guide, you can create a multilevel WordPress menu that enhances your site’s user experience and improves navigation.
FAQs About Creating A Multilevel/Hierarchical WordPress Menu
How do I create a multilevel (hierarchical) menu in WordPress?
In your WordPress dashboard, go to Appearance > Menus. Create a new menu or select an existing one. To create a multilevel menu, drag and drop menu items to arrange them. Indent an item under another to make it a submenu, creating a hierarchical structure.
Can I create a multilevel menu with both pages and categories?
Yes, you can include both pages and categories in your hierarchical menu. When adding items to your menu in Appearance > Menus, you can choose from pages, categories, and even custom links. Arrange them in a hierarchy by dragging and positioning them as desired.
How many levels deep can WordPress menus go?
WordPress menus can technically support multiple levels of depth. However, for usability and aesthetic reasons, it’s generally recommended to limit your menu to 2-3 levels deep.
How do I make a multilevel menu appear in my WordPress site’s navigation?
After creating and arranging your menu in a multilevel structure, assign it to a menu location in your theme. This is done in the “Manage Locations” tab in the Appearance > Menus section. Different themes offer various menu locations like header, footer, or sidebar.
Is it possible to style different menu levels differently?
Yes, you can style different menu levels differently by using CSS. WordPress adds specific classes to menu items and sub-items, which you can target with custom CSS. This customization can be added in the Customizer under Additional CSS or via a child theme’s style.css file.
::
Note: This article was originally published on May 24, 2023. But our team regularly reviews it and updates it with necessary improvements for accuracy.